
Breaking Down Costs: How Much to Paint My House?
August 7, 2023
Deciding on Exterior Paint: How to Choose Your House Color
September 5, 2023
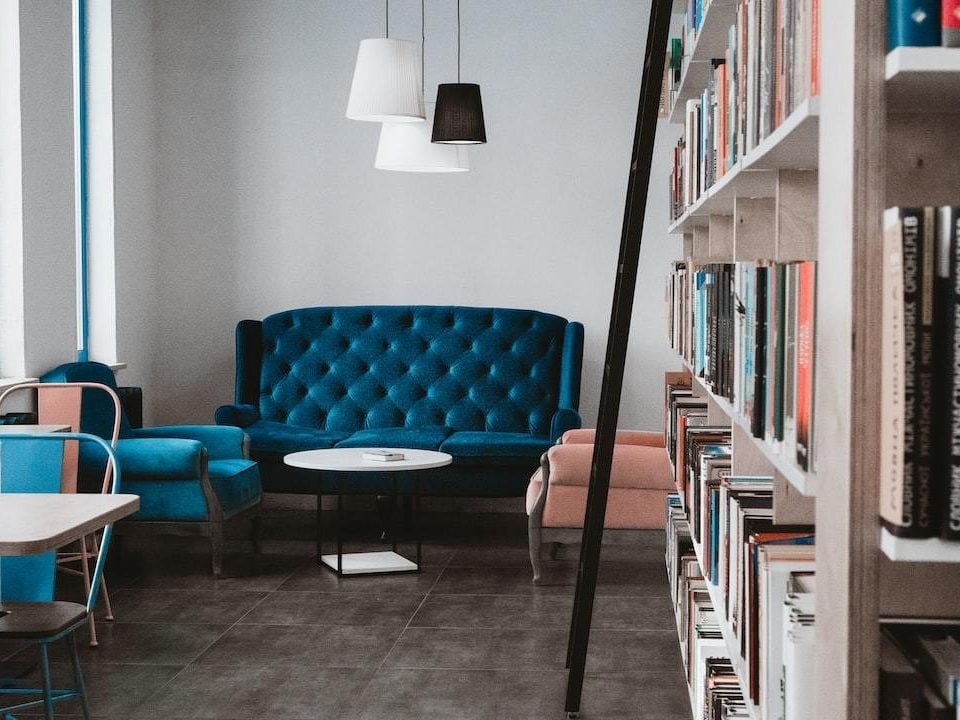
What do I need to paint my house interior? When the time comes to give your home a facelift, many homeowners wonder what is needed for interior painting.
The task may seem daunting, but with the right knowledge and tools, you can transform your living space into something special.
We’re not just talking about slapping on some color. A successful painting project requires careful planning and preparation to achieve professional results.
From choosing the right type of paint, preparing your walls, and selecting an appealing color scheme to understanding what you need to paint your house interior, there’s quite a bit involved in this process!
Table of Contents:
- Choose the Right Paint
- Prepare Your Home
- Calculate Paint Needs
- Gather Necessary Supplies
- Protect Furniture & Floors
- Start Painting
- Clean Up & Inspect Work
- Applying Finishing Touches to Your Interior Painting Project
- FAQs in Relation to What Do I Need to Paint My House Interior
- Conclusion
Choose the Right Paint
The first step in your interior painting project is selecting the right paint. This choice will significantly influence both the aesthetic appeal and durability of your walls.
Different Types of Paints
Interior paints are primarily categorized into two types: water-based (latex) and oil-based (alkyd). Water-based paints dry quickly, are simple to clean up, and generate a lower smell. However, their adherence might not be as strong on certain surfaces like galvanized or glossy ones where alkyd paints would perform better.
In contrast, oil-based paints provide excellent adhesion and stain resistance making them perfect for high-traffic areas or rooms exposed to grease such as kitchens or bathrooms. Keep in mind that these require longer drying times along with stronger solvents during cleanup.
Selecting Quality Over Price
A real quality paint job isn’t about buying cheap paint just because it’s cost-effective initially. Low-cost options often lack sufficient pigment concentration leading to inadequate coverage which means you’ll need more coats than if using premium products thereby increasing labor costs over time considerably.
An effective way when choosing between different brands is looking at their ‘hide’ rating – this indicates how well a single coat can cover previous colors or marks on your wall; hence saving you from multiple coatings application process.
Picking The Correct Finish
The finish refers to how much light reflects off painted surfaces; finishes range from flat (no shine), through eggshell semi-gloss enamel all way up glossiest option known as high-gloss enamel paint gives each room unique character while providing varying levels of protection against wear and tear daily life activities.
Flat finishes offer an elegant low-sheen look ideal for living rooms and bedrooms whereas semi-gloss enamels work best in kitchen bathroom environments due to their higher resilience to moisture stains and easy-clean properties.
High-gloss enamels create a dramatic mirror-like effect perfectly accentuating details such as trim doors and cabinets however due to extreme reflectivity any imperfections surface become highly visible thus requiring careful preparation before application.
Choosing the correct finish depends largely on individual needs and preferences specific space being painted Remember to invest little extra time in research planning upfront to ensure smoother execution painting project.
Key Takeaway:
Choosing the right paint for your interior painting project is crucial. Consider factors like type (water-based or oil-based), quality over price, and finish (from flat to high-gloss enamel). Your choices will impact not only aesthetics but also durability and maintenance requirements.
Prepare Your Home
Before you dive into your interior painting project, it’s crucial to prepare your home properly. Before you start painting, it’s important to ensure the paint will adhere correctly and provide a high-quality finish by following proper preparation steps.
Cleaning Surfaces: The First Step in Preparation
The first step before any painting is cleaning all surfaces thoroughly. Dust, grime, or oil on walls can lead to issues as they impede the paint from sticking properly. You might buy cheap paint only to find out later that your hard work was wasted because the uncleaned surfaces prevented proper adhesion.
You can use mild soap and water for most areas, but consider using trisodium phosphate (TSP) for particularly greasy spots like kitchen walls. Remember always to wear gloves when handling TSP as it can be harsh on the skin.
Patching Holes and Cracks: Ensuring Smooth Walls
No wall is perfect; there may be small holes from nails or cracks developed over time that need attention before beginning your painting project. Remember, choosing a color should not have these imperfections underneath. Use a putty knife and some spackling paste to fill these blemishes, then sand them smooth once dry – ensuring an even surface ready for fresh coats of semi-gloss enamel paint to give each room a properly prepared look.
Sanding Walls: Creating an Even Surface
To achieve an even surface ready for fresh layers of semi-gloss enamel paint or any other type you prefer, lightly sanding all painted areas is necessary – especially important if using oil-based paints to avoid peeling issues later down the line. Sandpaper with 120-grit works best here – remember to always dust off after sanding so no particles remain stuck under new layers of color.
Here are additional tips about proper wall-sanding techniques.
Priming Surfaces: Setting Up For Success
A good primer helps hide old colors while providing an excellent base layer upon which the final top coat.
Key Takeaway:
Before you start painting, ensure your home is properly prepped. Clean surfaces thoroughly to promote paint adhesion and patch any holes or cracks for a smooth finish. Lightly sand-painted areas before applying primer to set the stage for a high-quality paint job.
Calculate Paint Needs
The key to a successful interior painting project is meticulous planning and precise calculations. As Bob Vila’s guide on paint calculation suggests, understanding the area you must cover is essential for avoiding wastage or running out of paint midway.
Determining Wall Area & Ceiling Square Footage
To determine the amount of paint necessary, calculate the area of walls and ceilings in square feet. This involves measuring the height and width, then multiplying these figures together. If doors or windows are present, subtract their total area from the wall measurements to get an accurate figure.
Select Your Ideal Paint Type: Quality Over Quantity.
The type of paint chosen significantly impacts coverage rates. Oil-based paints have better coverage than latex variants, but they take longer drying times. For galvanized surfaces, alkyd paints prove ideal as other types may fail to adhere properly. Remember, choosing color schemes like your wife’s favorite colors could affect virtually all aspects related to planning out your painting project, so consider this when making calculations.
Note:
In most cases, two coats – one primer coat followed by the final top coat – are recommended to achieve professional-looking results. However, if you are changing colors drastically, such as from dark blue to white, or covering up stains/dark marks, extra coats might become necessary.
Most manufacturers list estimated coverage rates – usually around 350-400 sq ft per gallon for flat/matte finishes and slightly less for glossier ones like semi-gloss enamel, which give a shiny effect after application – on can labels. These estimates assume ideal conditions; rougher textures require more paint, while smoother ones require less.
Gather Necessary Supplies
Embarking on an interior painting project requires a variety of tools and supplies. These range from brushes, rollers, ladders, drop cloths, and more.
The Importance of Brushes and Rollers
A quality paint job starts with the right brush or roller. The size of your brush depends on the precision required for areas like windows, doors, or trim work.
For larger wall surfaces where speed is essential without compromising evenness in paint distribution, you’ll need a good roller. Choose one with a thicker nap for textured walls while thinner naps are perfect for smooth surfaces.
Ladders: A Must-Have Tool
If you have high ceilings or upper walls that require attention during your painting project, remember that choosing a sturdy ladder is paramount. OSHA’s guidelines are worth reviewing when using ladders safely in home improvement projects such as this.
Tape: For Precision Painting
To achieve those clean lines between different colors or the ceiling and wall, painter’s tape comes in handy. This type doesn’t adhere too strongly, thus preventing damage upon removal but holds firm enough to prevent seepage under its edges during painting.
Coverings: Drop Cloths & Plastic Sheeting
Safeguarding furniture against dust created by sanding before the actual painting begins, as well as protecting floors from potential splatters once painting commences, becomes easier thanks to coverings namely – drop cloth and plastic sheeting. Bob Vila offers tips on protecting carpets best DIY, including effectively using these types of coverings.
Sanding Tools And Patching Compound:
In case there are imperfections present within walls, such as holes, nails, or dents, a patch compound is needed along with sandpaper or sanding sponges. Apply the compound and allow it to dry fully, allowing you to get back to a smooth surface ready for the primer coat application, followed by the final top coat layer(s).
Key Takeaway:
From brushes to ladders, painter’s tape to drop cloths, every tool plays a crucial role in your interior painting project. Quality and correct usage of these tools ensure precision, safety, and cleanliness. Don’t forget the patching compound for wall imperfections – it’s all about that smooth finish.
Protect Furniture & Floors
In the world of interior painting, protecting your furniture and floors is an essential step. This not only maintains cleanliness but also safeguards your valuable belongings from any paint splatters or drips.
The first line of defense involves removing as much furniture as possible to create a spacious work area. For immovable items, consider covering them with sturdy drop cloths for optimal protection.
Moving and Covering Furniture
Starting off with moving all movable pieces out of the room can make a significant difference in facilitating movement during the painting project. If some items are too heavy or large to move, consolidate them into one area away from walls slated for painting.
Cover these consolidated items using heavy-duty drop cloths. These provide superior protection compared to thin plastic sheets which may tear easily when subjected to sharp objects on furniture.
Shielding Your Floors
Your flooring needs equal attention – especially carpets that might be difficult to clean if paint spills onto it accidentally. Use rosin paper taped down at the edges with painter’s tape; this offers excellent coverage against potential spills without leaving sticky residue upon removal after drying.
Cover Fixtures And Wall Outlets
All wall fixtures such as light switches and outlets should be covered before you embark on applying semi-gloss enamel paint job throughout your house’s interiors. You could remove outlet covers entirely before applying painter’s tape over exposed areas so they don’t get stained by accidental brush strokes.
Taping Baseboards And Trim
If there’s trim along baseboards, windowsills, etc., ensure those are well protected too. Apply painter’s tape along their edges carefully ensuring every inch gets covered – even corners where two trims meet each other mustn’t escape attention because sometimes roller brushes tend to spill over unexpectedly.
Here are a few extra tips:
- Avoid buying cheap paint supplies; instead,
Key Takeaway:
Key Takeaway: When painting your home’s interior, safeguarding furniture and floors is paramount. Clear the area of movable items, cover immovable ones with sturdy drop cloths, shield carpets with rosin paper taped down at edges, and protect fixtures like light switches and outlets. Don’t skimp on quality paint supplies for a professional finish.
Start Painting
The time has come to apply your chosen paint and transform the interior of your home. Remember, a quality paint job is not about speed but precision and attention to detail.
Prioritize Your Painting Order
It’s best practice in any painting project to start from the top down. This strategy prevents freshly painted areas from being marred by drips or smudges. Begin with ceilings before moving on to walls, doors, windows, trims, and finally baseboards.
A key tip for color selection: it’s more than just personal preference – consider how colors can make rooms feel peaceful or even make your house feel warmer based on their undertones.
Selecting The Right Paint Type
You might be tempted to buy cheap paint as an upfront cost-saving measure; however, this could cost you more long-term due to its requirement for multiple coats for good coverage.
Semi-gloss enamel paints are an ideal choice for most interior surfaces like drywall plastered walls because they’re durable and easy to clean.
Gauging Proper Drying Time & Applying Second Coat
Allow the first layer to dry completely before applying a second one for proper adhesion. Refer to the manufacturer’s instructions for accurate drying times as temperature and humidity may affect them; this will ensure a successful second coat application, allowing 24 hours after the final top coat before moving furniture back against the walls. After the final top coat application, wait at least 24 hours before reattaching hardware or moving furniture back against the walls to avoid damaging the fresh new look.
Mistakes To Avoid While Painting
- Beware common pitfalls such as rushing through the prep stage and skipping primer, especially when dealing with dark colors or oil-based paints. These issues take time to prepare the room properly, ensuring a smooth and clean surface upon which the work will show the truest representation of your chosen palette.
Key Takeaway:
Painting your home’s interior is a game of precision, not speed. Start from the top down to avoid drips and consider color undertones for room ambiance. Don’t skimp on quality paint; it pays off in coverage and durability. Allow proper drying time between coats and don’t rush prep work – it’s key for a flawless finish.
Clean Up & Inspect Work
Upon completing your interior painting project, it’s essential to focus on clean-up and work inspection. This phase is pivotal in ensuring a quality paint job. The cleaning process includes removing all protective materials, tidying up tools, and appropriately disposing of leftover resources.
The Importance of Proper Clean-Up After Painting
Your first task post-painting should be carefully peeling off tapes from walls and trims. Following this step involves bringing down drop cloths or plastic sheets for safeguarding furniture pieces and flooring surfaces during the painting process. Be mindful not to allow trapped dust particles or stray paint chips to fall onto freshly painted areas.
Moving forward with tool cleanup, brushes and rollers demand thorough cleansing using soap mixed with water if latex-based paints were utilized, while oil-based paints necessitate specific thinners for proper cleaning. Portland’s hazardous waste facilities are ideal locations for environmentally friendly disposal methods.
Paying Attention During Inspection
An integral part of every successful painting project lies in dedicating time towards meticulous inspection once everything has thoroughly dried – doing so helps ensure that semi-gloss enamel paint finishes appear smooth without visible imperfections such as drips or streaks which could tarnish an otherwise perfect finish.
If you stumble upon regions where paint won’t adhere correctly or notice conspicuous brush strokes present on gloss enamel painted surfaces – don’t worry. These issues can typically be rectified by lightly sanding problematic areas followed by another layer application using quick-drying but high-quality non-cheap alternatives.
A Final Walkthrough For Quality Assurance Is Crucial.
To wrap up your examination procedure, conduct a final walkthrough across each room, properly checking every corner meticulously under varying lighting conditions – natural light versus artificial lights may reveal discrepancies unnoticed before.
If possible, invite someone else too because fresh eyes often catch things missed previously.
Make a note of anything needing touch-ups: small spots missing color coverage, uneven lines around trim, etc. Now would be a good time to fix them using the remaining extra paint stored away from
Key Takeaway:
Don’t skimp on the clean-up and inspection after painting your home’s interior. Carefully remove tapes, tidy up tools, dispose of leftovers responsibly, and check for imperfections under different lighting conditions. Remember – a second pair of eyes can catch what you might have missed.
Applying Finishing Touches to Your Interior Painting Project
The final steps of your painting project can make a difference in achieving a high-quality paint job. Let’s explore how you can apply these finishing touches and give your home the professional look it deserves.
Picking Out Trim Paint
Selecting the right trim paint is essential. Semi-gloss enamel paint, renowned for its robustness and easy cleanability, is usually employed on trim. However, when undertaking this part of your painting project, remember that choosing the color should be done carefully – aim to complement rather than compete with the wall colors.
If picking out colors seems daunting, consider seeking advice from a professional interior home decorator or using virtual tools for color palette planning, which allow you to try different combinations before settling on one.
Laying Down The Final Top Coat
A top coat might be necessary depending on the type of paint used and the desired finish. This not only ensures durability but also offers an additional layer against wear and tear – crucial if oil-based paints are chosen. Avoid skipping this step because without it, sometimes the paint won’t adhere properly, leading to chipping or peeling down the line.
To help speed up drying times during the application process, ensure proper ventilation by opening windows where possible or utilizing fans in the room.
Caring For Newly Painted Walls
Once the walls have been painted, they require careful handling. Refrain from hanging pictures or moving furniture back until everything has completely dried, usually 24 hours at least, but always check the instructions to be sure. Also, an important note: Avoid cleaning freshly painted surfaces, especially those coated with latex, within the first two weeks after completion so as not to damage the new coating.
In conclusion, applying finishing touches isn’t simply about aesthetics, though it certainly plays a part. Ensuring longevity through careful preparation and maintenance techniques is also essential. So whether you’re adding new life to an old property or embarking on a full-scale renovation effort, the effort you put forth now will pay dividends in the long run.
Remember, even the smallest details matter and can make
Key Takeaway:
Choosing the right trim paint, applying a top coat for durability, and caring for freshly painted walls are key to achieving a professional finish. Remember: it’s not just about looks; preparation and maintenance ensure longevity. Your efforts now will pay off in spades.
FAQs in Relation to What Do I Need to Paint My House Interior
What Do I Need to Paint My House Interior?
You’ll need the right type of paint, brushes, rollers, drop cloths or plastic sheeting for protection, tape for edges and trim, ladders if necessary, and a color scheme in mind.
What Is the Correct Order to Paint a Room?
The usual sequence is ceiling first, then walls. Start from top to bottom, avoiding drips on freshly painted surfaces. Finish with trims last.
Can I Paint the Interior of My House by Myself?
Absolutely. With proper preparation and patience, you can achieve professional results by painting your home’s interior yourself.
How Do I Prepare My Interior Room for Painting?
Clean walls thoroughly, removing dust or grime. Patch any holes or cracks, then sand smooth. Apply primer if needed before starting with your chosen color.
Conclusion
Painting your house interior is no small task.
Though daunting, with the right resources and knowledge painting your house interior is attainable.
You’ve learned about choosing the best paint type for your needs.
The importance of preparing your home before you start painting has been emphasized.
We’ve discussed selecting a color scheme that suits your style and decor perfectly.
And we covered how to calculate exactly how much paint you’ll need for the job at hand.
Gathering necessary supplies was another key point discussed, as well as protecting furniture and floors from unwanted splatters or drips.
You now know to start painting from top to bottom, cleaning up afterward while inspecting the work done carefully.
Last but not least, applying those finishing touches can make all the difference in creating a space that truly feels like yours.
If this seems overwhelming or you simply want professional results without lifting a brush yourself – ESP Painting is here for you! As expert Interior and Exterior House Painters based in Portland Oregon, we take pride in transforming homes into stunning spaces with our quality services. Click here to discover more about us today!

Jeff Sommers is a vibrant and experienced professional, having been at the helm of ESP Painting, Inc. for 27 remarkable years. As President, he has become an esteemed leader in the Commercial & Residential Construction industry in Oregon, United States. His experience has seen him gain valuable insight and knowledge, making him an invaluable asset to ESP Painting and its customers. With a bubbly personality and upbeat attitude, Jeff always looks ahead to the future as he continues his leadership journey toward success.

